# Fills
> Add solid colors, gradients, images, and Color Variables as fills to your layers and frames. Apply multiple fills, adjust opacity, and swap fills and borders.
**URL:** https://www.sketch.com/docs/symbols-and-styles/styling/fills/ | **Last updated:** 2026-04-07
---
Fills let you add color, gradients, or images to your shapes and layers. You can apply multiple fills to create depth and texture, adjust their blending, and control how they interact with other layer styles.
By default, new layers and frames have a single, solid color fill.
## Fill types
There are four different fill types you can use:
- **Solid fill** : a flat, single color.
- **Gradient**: a blend between two or more colors. See [Gradients](/docs/symbols-and-styles/styling/gradients) for more detail. There are three gradient types:
- **Linear** : blends along a straight line.
- **Radial** : radiates outward from a center point.
- **Angular** : sweeps colors around a center point.
- **Image fill** : uses an image as the fill, with options to scale, fit, stretch, or tile it.
- **Color Variable** : links the fill to a [Color Variable](/docs/symbols-and-styles/color-variables), so it updates across your document when the Color Variable changes.
## Adding and removing fills
To add a new fill, click in the **Fills** section on the Inspector. You can add as many fills as you like to a single layer and they’ll stack on top of each other. You can reorder fills by clicking any empty area of a fill in the Inspector, then dragging it to a new position in the list.
To remove a fill, turn off its toggle and click next to the **Fills** section title.
For each fill you create, you’ll have the following options:
1. **Enable/Disable toggle.** You can enable or disable all the fills of a frame or layer by pressing ⇧F.
1. **Color preview.** Click on it to open the [color panel](/docs/symbols-and-styles/styling/the-color-panel/) and choose a different color or change the fill type.
1. **Hex code.** If you’re using a solid color fill, you’ll see its HEX value here for easy copying. If you’re using a gradient or image fill, this area shows options to change its type. You can also right-click a fill row to copy its color value in popular formats — [learn more](/docs/symbols-and-styles/styling/the-color-panel#copying-color-values).
1. **Opacity.** You can change a fill’s opacity to combine and show two or more fill types.
> **Note:** You can paste a hex code with an alpha value into the Hex field, which will apply the correct opacity. For example, `#FF000080` will become a color with a hex value of `#FF0000` and an opacity of 50%. The last two characters are the opacity value. Opacity values are base-16, which is why 80 becomes 50% — and not 80%.
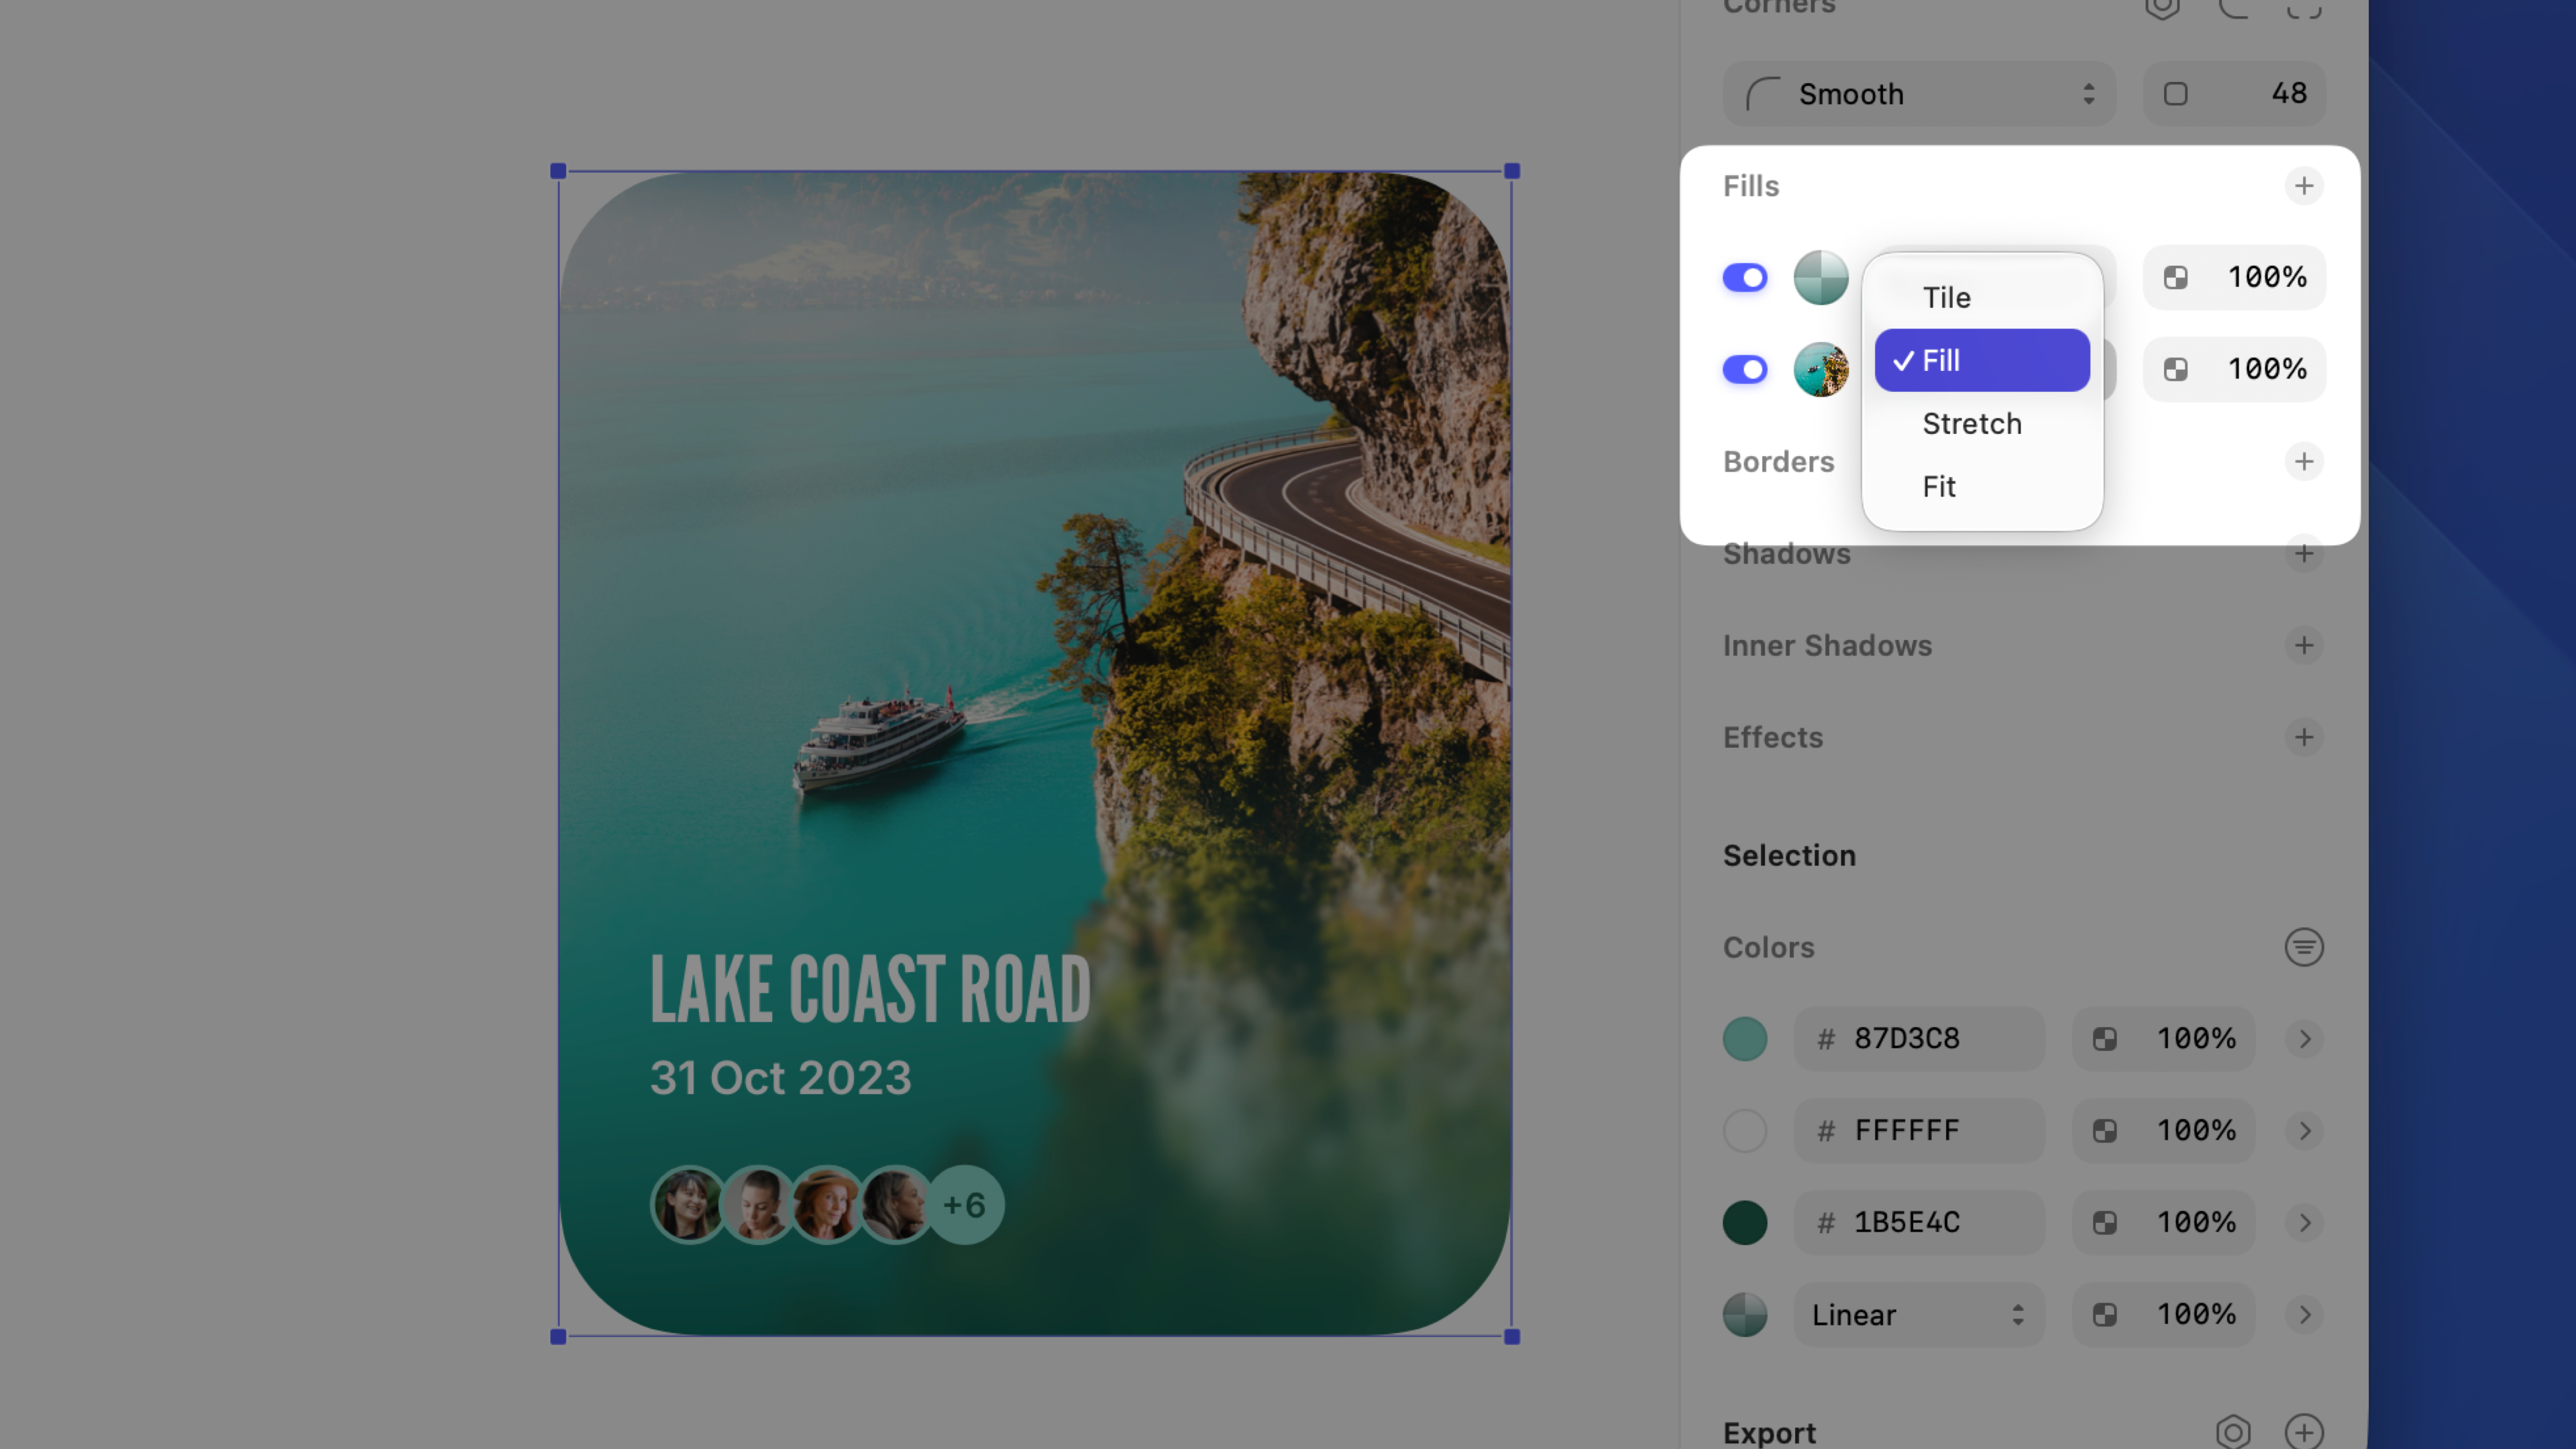
## Adding an image fill
Open the color panel and select the Image fill . Choose your own image using **Choose Image** in the preview, or pick one from the presets at the bottom of the panel. You can also drag an image file directly onto the fill’s color preview in the Inspector to apply it as an image fill. Click the Data icon to use an image from a [data source](/docs/designing/data).
You can then choose from four scaling modes:
- **Fill** adjusts the size of the image to fit the layer’s width.
- **Fit** adjusts the size of the image to fit the layer’s height.
- **Stretch** fits the image to the layer’s height and width ratio by stretching it.
- **Tile** keeps the image at its original size (unless you adjust it) and repeats it to fill the layer.
You can also click the clock icon above the image preview to see frequently used images in your document, or choose a basic pattern or noise fills from the global presets at the bottom.
> **Note:** You can paste an image from outside Sketch directly as a fill using **Paste Image as Fill**. Copy the image, select a layer, then press ⌃, click the fill preview and choose **Paste Image as Fill**. This option appears only when your clipboard contains a compatible image.
## Swapping fills and borders
Select a layer or frame, then press ⇧X to swap its fills and borders. You can also right-click the **Fills** or **Borders** section header in the Inspector and choose **Swap Fills and Borders**, or find the action in **Layer** > **Style** and the Command Bar.
When you swap fills and borders:
- Colors swap between enabled fills and borders, from top to bottom.
- Border positions and widths don’t change.
- If there are more fills than borders (or the other way around), any extra styles use default settings.
- Image fills don’t swap — borders don’t support them.
- Gradient fills with less than 100% opacity turn fully opaque when applied as borders.
## Changing fill settings for overlapping paths
When you’ve applied a fill to a shape, use the [Command Bar](/docs/interface-and-settings/the-mac-app-interface/the-command-bar/) to choose between the Non-Zero or Even-Odd fill rules, based on the [winding rule](https://en.wikipedia.org/wiki/Nonzero-rule). You can search for "_fill rule_" in the Command Bar to access this option quickly.
## Including fills as content
Frames and graphics let you use fills as content. When enabled, the fill is included in asset exports and when playing prototypes. For example, in Symbol Sources, a fill can help highlight the frame’s contents, but you usually don’t need it when inserting Symbol instances.
This option is enabled by default for frames and disabled for graphics. You’ll find it in the Export section of the Inspector.
## Adjusting a layer’s opacity
As well as dragging the opacity slider, or typing a percentage in the field next to it, you can quickly set a layer’s opacity by selecting your layer and pressing 0-9 (e.g. 3 for 30% opacity). Pressing two numbers quickly will set a more exact opacity (e.g. 2 and 5 for 25% opacity).
## Organizing style properties
Click on the space between a style property’s controls to drag it above or below other properties.
Check or uncheck the checkbox next to each style property to enable or disable it.
To remove a style property altogether, click and drag it out of the Inspector, Control-click on it and choose **Remove**, or click on at the top of the panel (if it’s disabled).
## Copying and pasting styles
Select the layer you want to copy styles from, then choose **Edit** > **Copy** > **Copy Style** (or press ⌘⌥C). Then select the layer you want to paste those styles to and choose **Edit** > **Paste** > **Paste Style** (or press ⌘⌥V).
You can also right-click the **Style** header in the Inspector to:
- Copy Style (⌥⌘C)
- Paste Style (⌥⌘V)
- Paste Style Without Corners (⌃⌥⌘V).
## Setting a default style for new layers
You can set a default style for every new layer instead of the one Sketch applies by default — for example, a specific fill, a gradient and a shadow, but no border. Create a layer, adjust its styles, then go to **Layer** > **Style** > **Set as Default Style**.