# Borders
> Add borders to any layer in Sketch and customize their position, width, fill, and more — including per-side borders and gradient borders.
**URL:** https://www.sketch.com/docs/symbols-and-styles/styling/borders/ | **Last updated:** 2026-04-07
---
You can add as many borders as you like to your layers, frames, or graphics — each with different thicknesses, colors, and blurs.
## Adding and removing borders
Select a layer, frame or graphic and head to the **Borders** section in the Style panel of the Inspector. Click to add a border. Set the thickness using the number field in the border row and choose a solid color or apply a gradient — see [the color panel](/docs/symbols-and-styles/styling/the-color-panel) for more detail.
> **Note:** You can right-click a border row to copy, paste, duplicate, or remove it. Choose **Copy Value** to copy the border’s color in popular formats — see [The Color Panel](/docs/symbols-and-styles/styling/the-color-panel#copying-color-values) for more detail.
To remove a border, disable its toggle switch, then click next to the **Borders** section title.
**Reordering and swapping borders**
If you have more than one border, you can drag borders to reorder them in the list. You can also swap all your fills and borders at once. Right-click the **Borders** section title and choose **Swap Fills and Borders**, or press ⇧X. See [Swapping fills and borders](/docs/symbols-and-styles/styling/fills#swapping-fills-and-borders) for more detail on how it matches colors and styles during a swap.
> **Note:** You can quickly show or hide borders on any layer by pressing ⇧B.
## Setting a border position
In the border row, click the position dropdown to choose where the border sits, whether that’s **Inside** , **Center** , or **Outside** the shape’s outline. For [open paths](/docs/designing/vector-editing/#opening-and-closing-paths), you can only use Center.
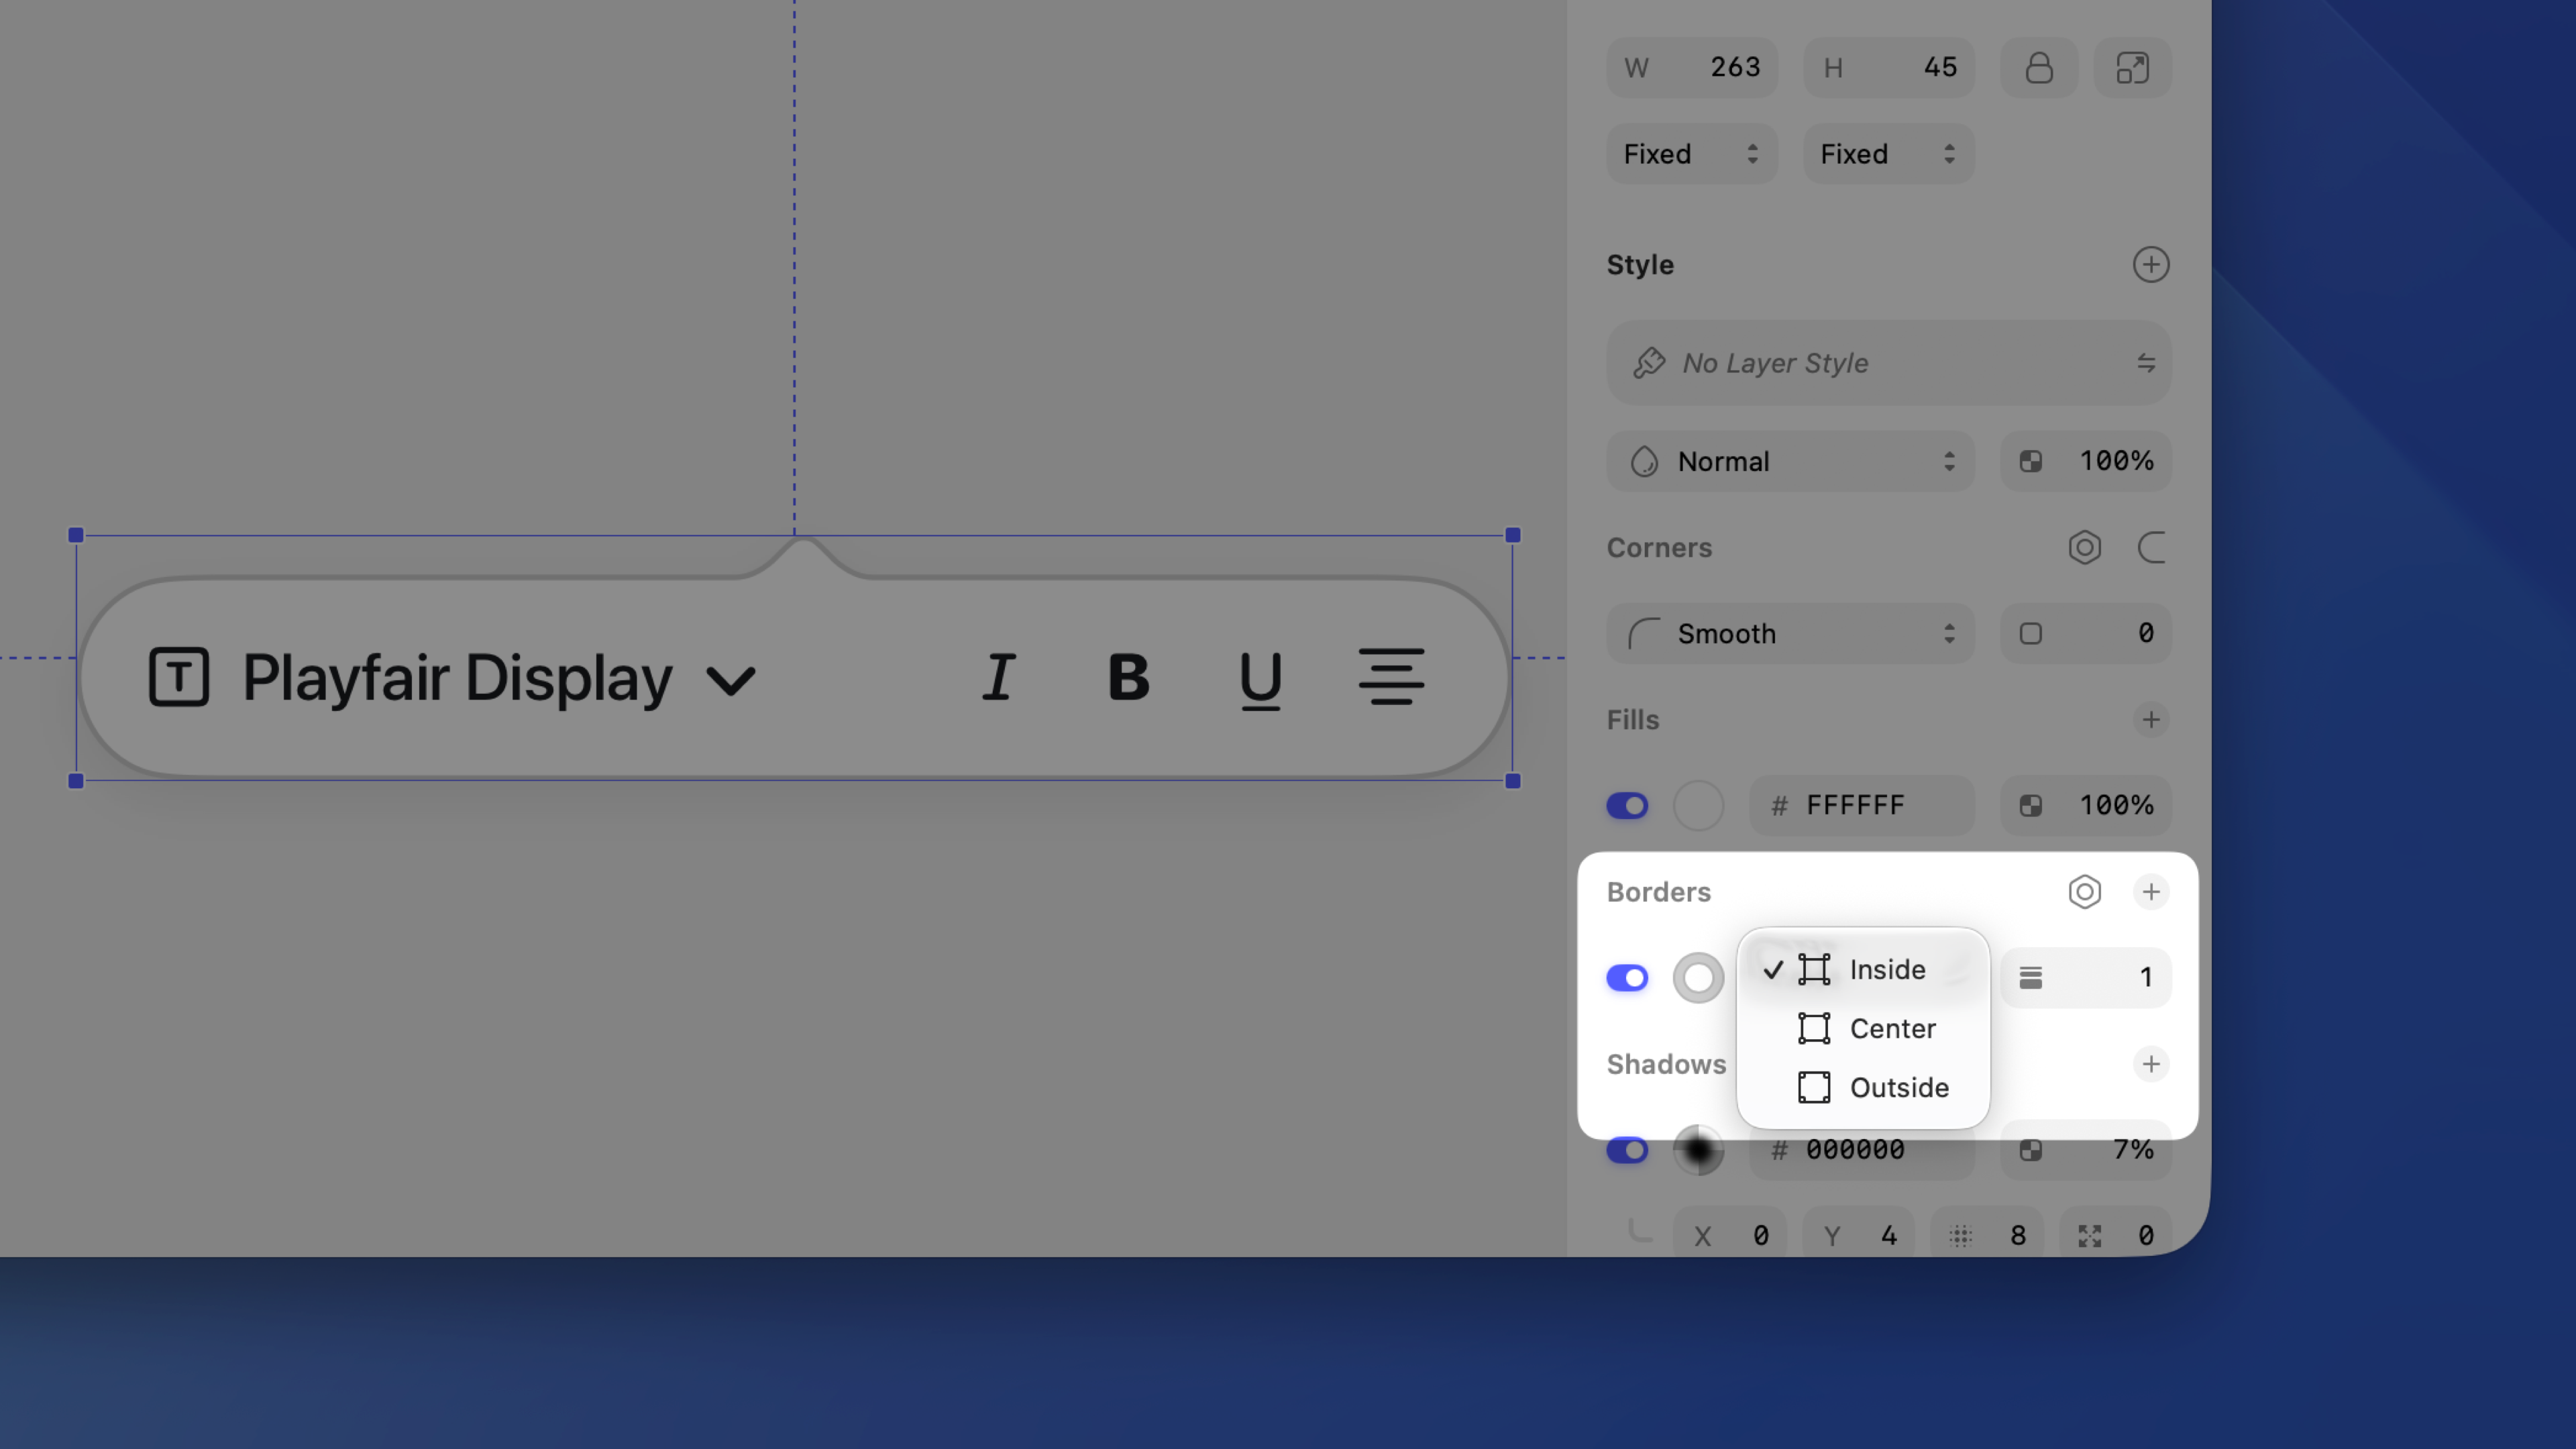
*Choose to place your border Inside, Center, or Outside the layer’s outline.*
## Setting individual borders
For frames, rectangular shapes, and image layers, click the sides dropdown in the border row, next to the position dropdown, and choose between **All**, **Top**, **Bottom**, **Left**, **Right**, or **Custom**.
- **Top, Bottom, Left, Right:** The border applies its existing thickness and settings to that side only. This is useful when you want a border on just one side — for example, a bottom border to create a divider.
- **Custom:** Set a different thickness for each side independently. You’ll see four fields below the border row — one per side. Set a side’s thickness to 0 to disable it.
> **Note:** You can only use per-side borders on rectangular layers — frames, rectangles, and image layers. If you edit the path so it’s no longer rectangular, per-side borders revert to a single border around the entire path.
## Customizing borders
Click the settings icon next to the **Borders** section title to open the border settings panel. Here you can set cap and join styles, add arrowheads, and create dashed lines.
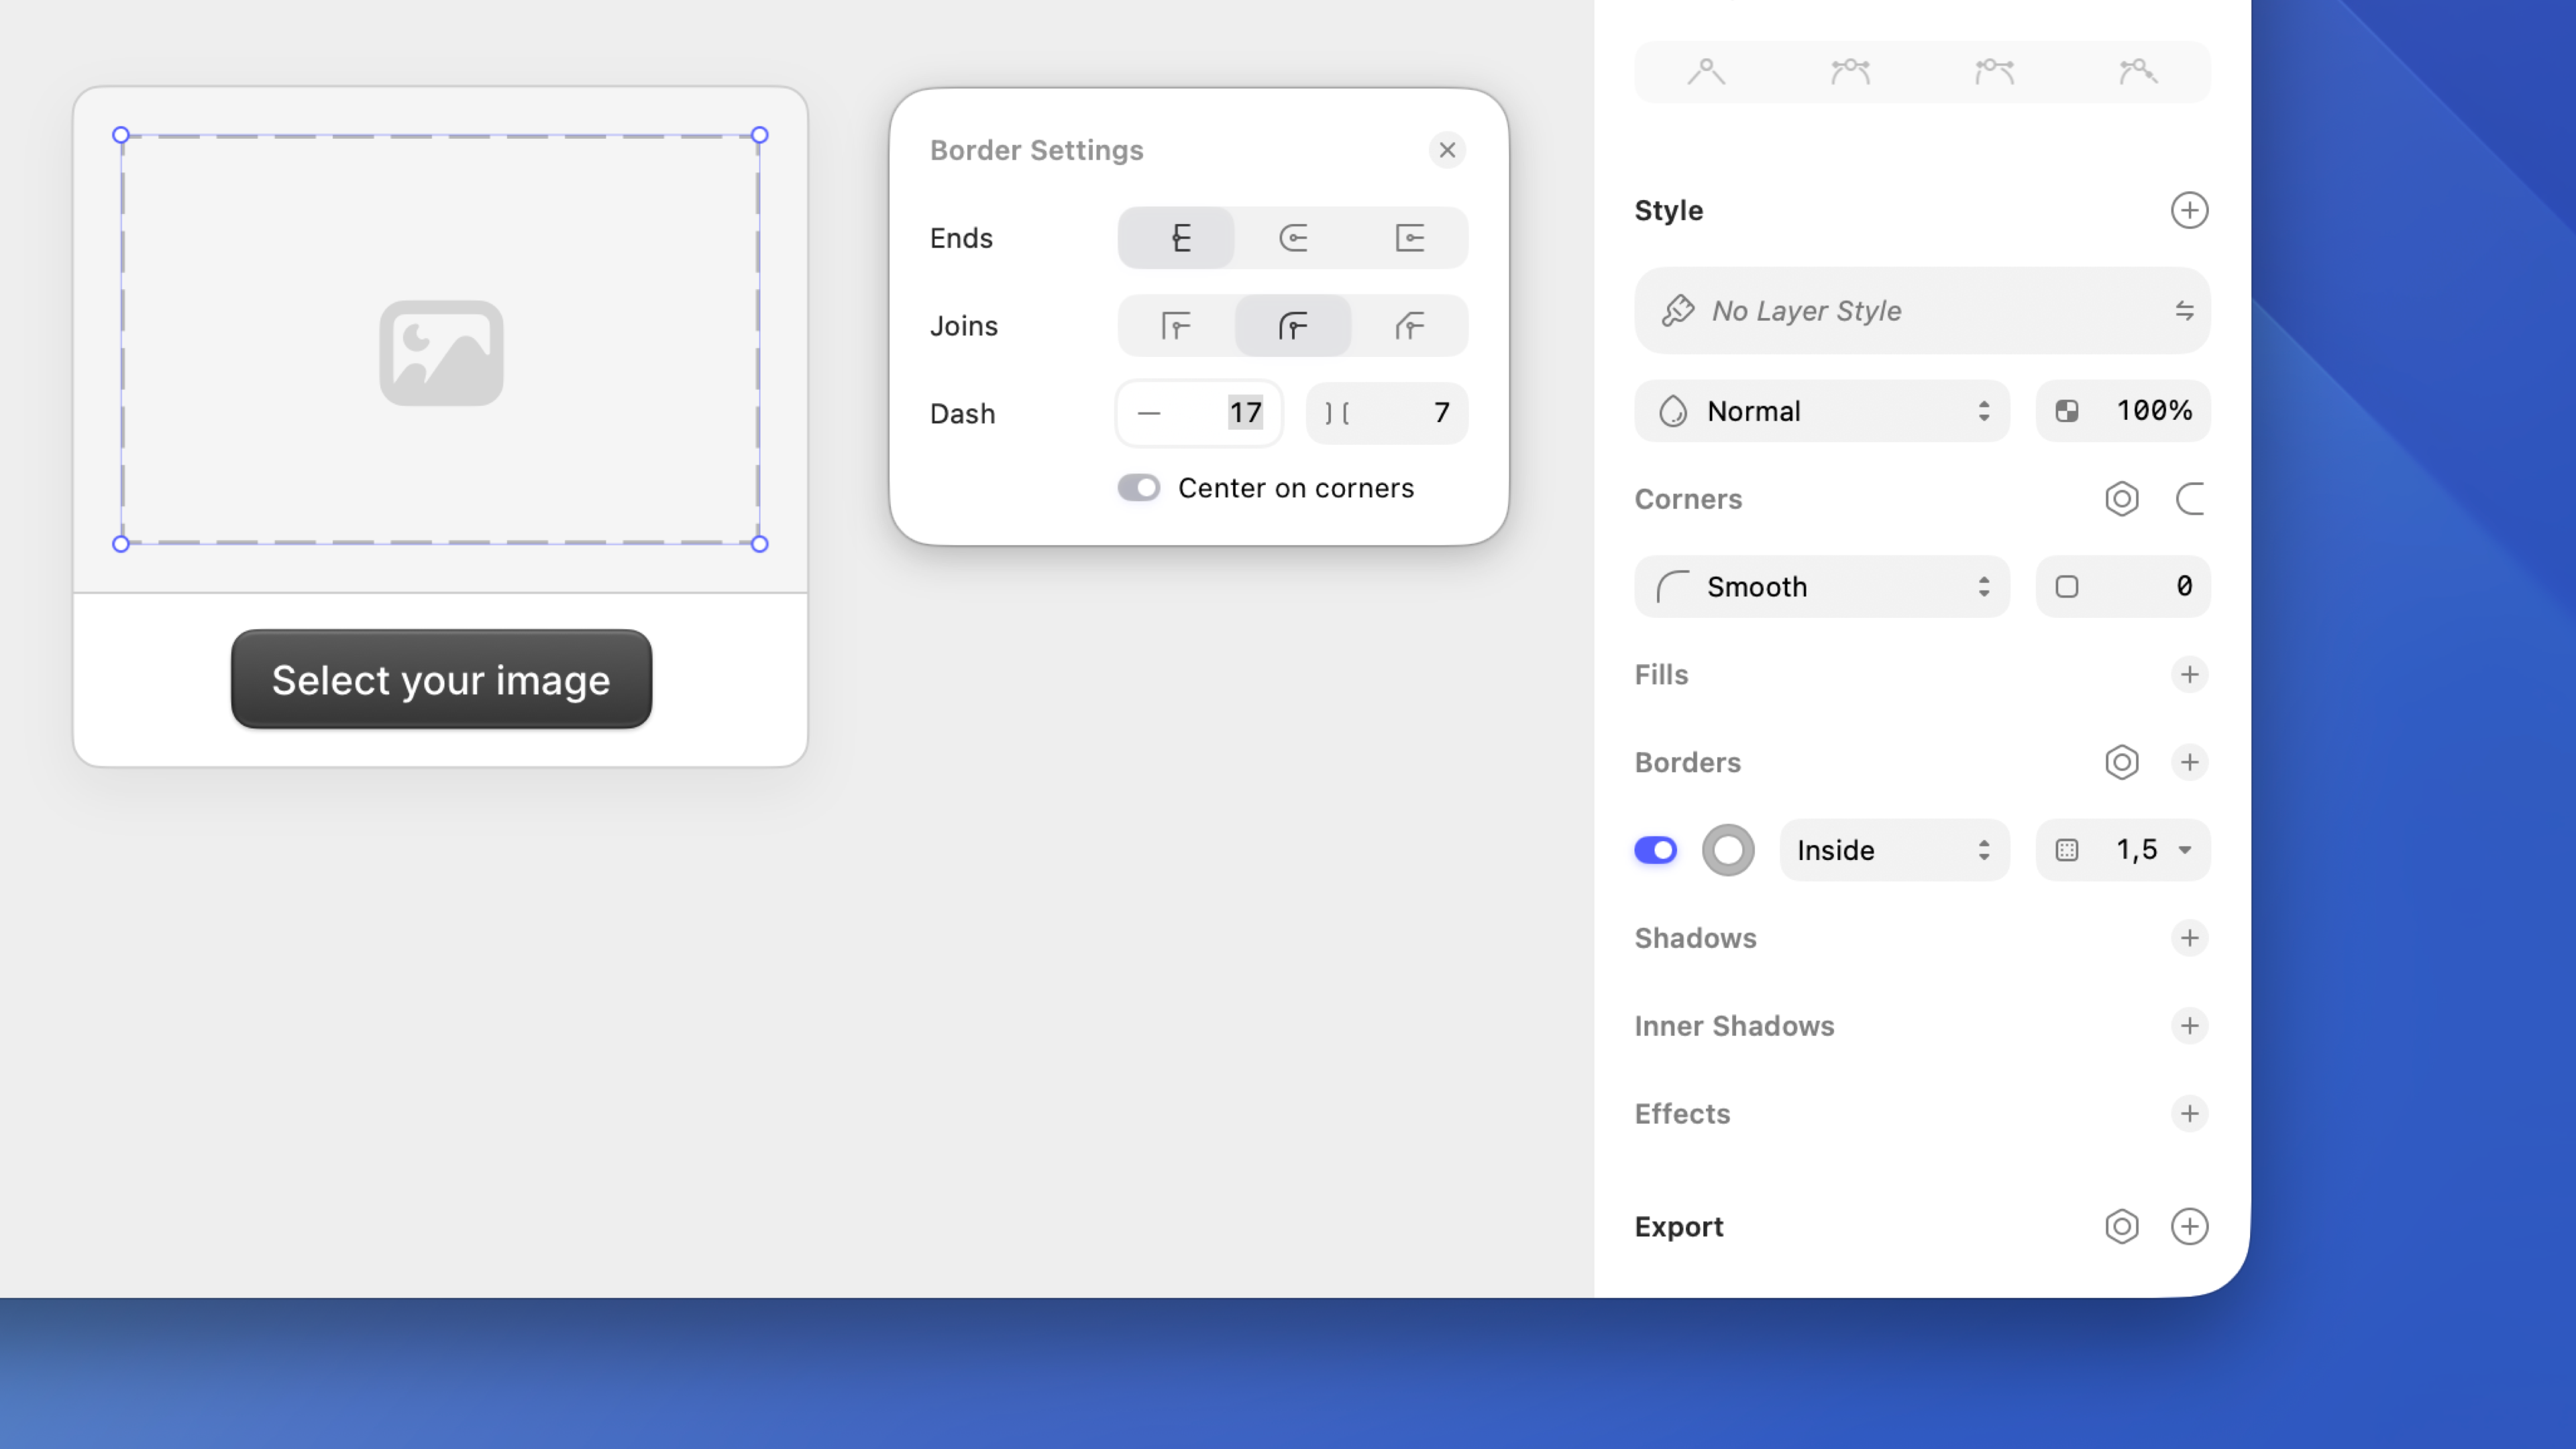
*Use the Border Settings panel to control ends, joins, arrowheads, and dashes*
> **Note:** These border settings also work on text layers — so you can apply caps, joins, and dashes to text borders too.
For line layers and open paths, you can choose from three types of border end:
- **Butt cap **: Draws the border exactly to the vector point
- **Round cap **: Adds a rounded, semi-circular end that extends past the vector point
- **Projecting cap **: Similar to the butt cap, but extends the border past the vector point with straight edges
For paths with corners, you can choose from three types of join:
- **Miter join **: Creates a sharp corner by extending the edges of the border until they meet
- **Round join **: Creates a rounded corner with a radius relative to the border thickness
- **Bevel join **: Creates a flat corner by cutting off the tip of the join
For line layers, choose arrowheads for the start and end of the path using the drop-down menus in **Points**. To switch which end they appear on, choose **Layer > Path > Reverse Order**.
To create dashed lines, enter a value in the **Dash** field to set the length of the dashes. The **Gap** field sets the distance between dashes and automatically matches the dash length unless you set it to something different. To reset it, clear the **Gap** field.
To make dashes fall neatly on corners, check **Center on corners**. This adjusts the dash spacing so each corner gets a complete dash instead of a gap or partial dash — it’s enabled by default on new layers.
> **Note:** To create a dotted line, set the end type to a round cap , then set the dash value to 0. Adjusting the gap distance will change the look of your dotted border.
You can also [copy and paste styles](/docs/symbols-and-styles/styling/fills/#copying-and-pasting-styles) or [reorder style properties](/docs/symbols-and-styles/styling/fills/#organizing-style-properties) across any style type.