# Text
> Learn how to edit text in Sketch with the help of our step-by-step guides and video tutorials.
**URL:** https://www.sketch.com/docs/designing/text/ | **Last updated:** 2026-05-19
---
## Adding text
Press ⌘T and click anywhere on the Canvas to add a text layer. Alternatively, click on the Insert menu in the toolbar and select **Text**.

*Press ⌘T or select Text from the Insert menu on the Toolbar *
You can also click, then drag to create a fixed size text box where text will wrap to a new line instead of expanding the size of the text box.

*Click and drag to created a fixed size text box*
### Editing text
To edit a text layer, double-click it on the canvas, or select it and press ↵ or ⌘↵. When you enter edit mode, all text is pre-selected so you can start typing to replace it. If you’re already editing text and click another text layer, the text cursor moves to where you click.
### Adding rich text
Rich text preserves your formatting, like bold or italic styles, when you insert text in Sketch. Press ⇧⌥⌘V to paste as rich text or press S to launch the Command Bar and type _Rich text_.

*Paste rich text with the shortcut or with the Command Bar*
### Adding text to a vector path
To add text to a vector path, you’ll need both a text layer and a shape layer below it in the Layer List. Select the text layer and then select **Text** > **Text on Path** from the Menu Bar. Finally, drag your text layer towards your shape layer and let it snap into place.

*How to add text to a vector path*
To remove text from the path, select **Text** > **Text on Path** again.
## Formatting text
You’ll find many ways to change how your text looks in the Inspector, along with a few more advanced options in the Text menu in the Menu Bar.
> **Note:** Sketch measures all layers (including text) using the macOS coordinate system’s points, where one point equals one pixel on the Canvas by default. [Learn more](/support/features/mac-app/points-vs-pixels/).
### Formatting text in the Inspector
Select a text layer on your Canvas to see most formatting options and properties in the Inspector.
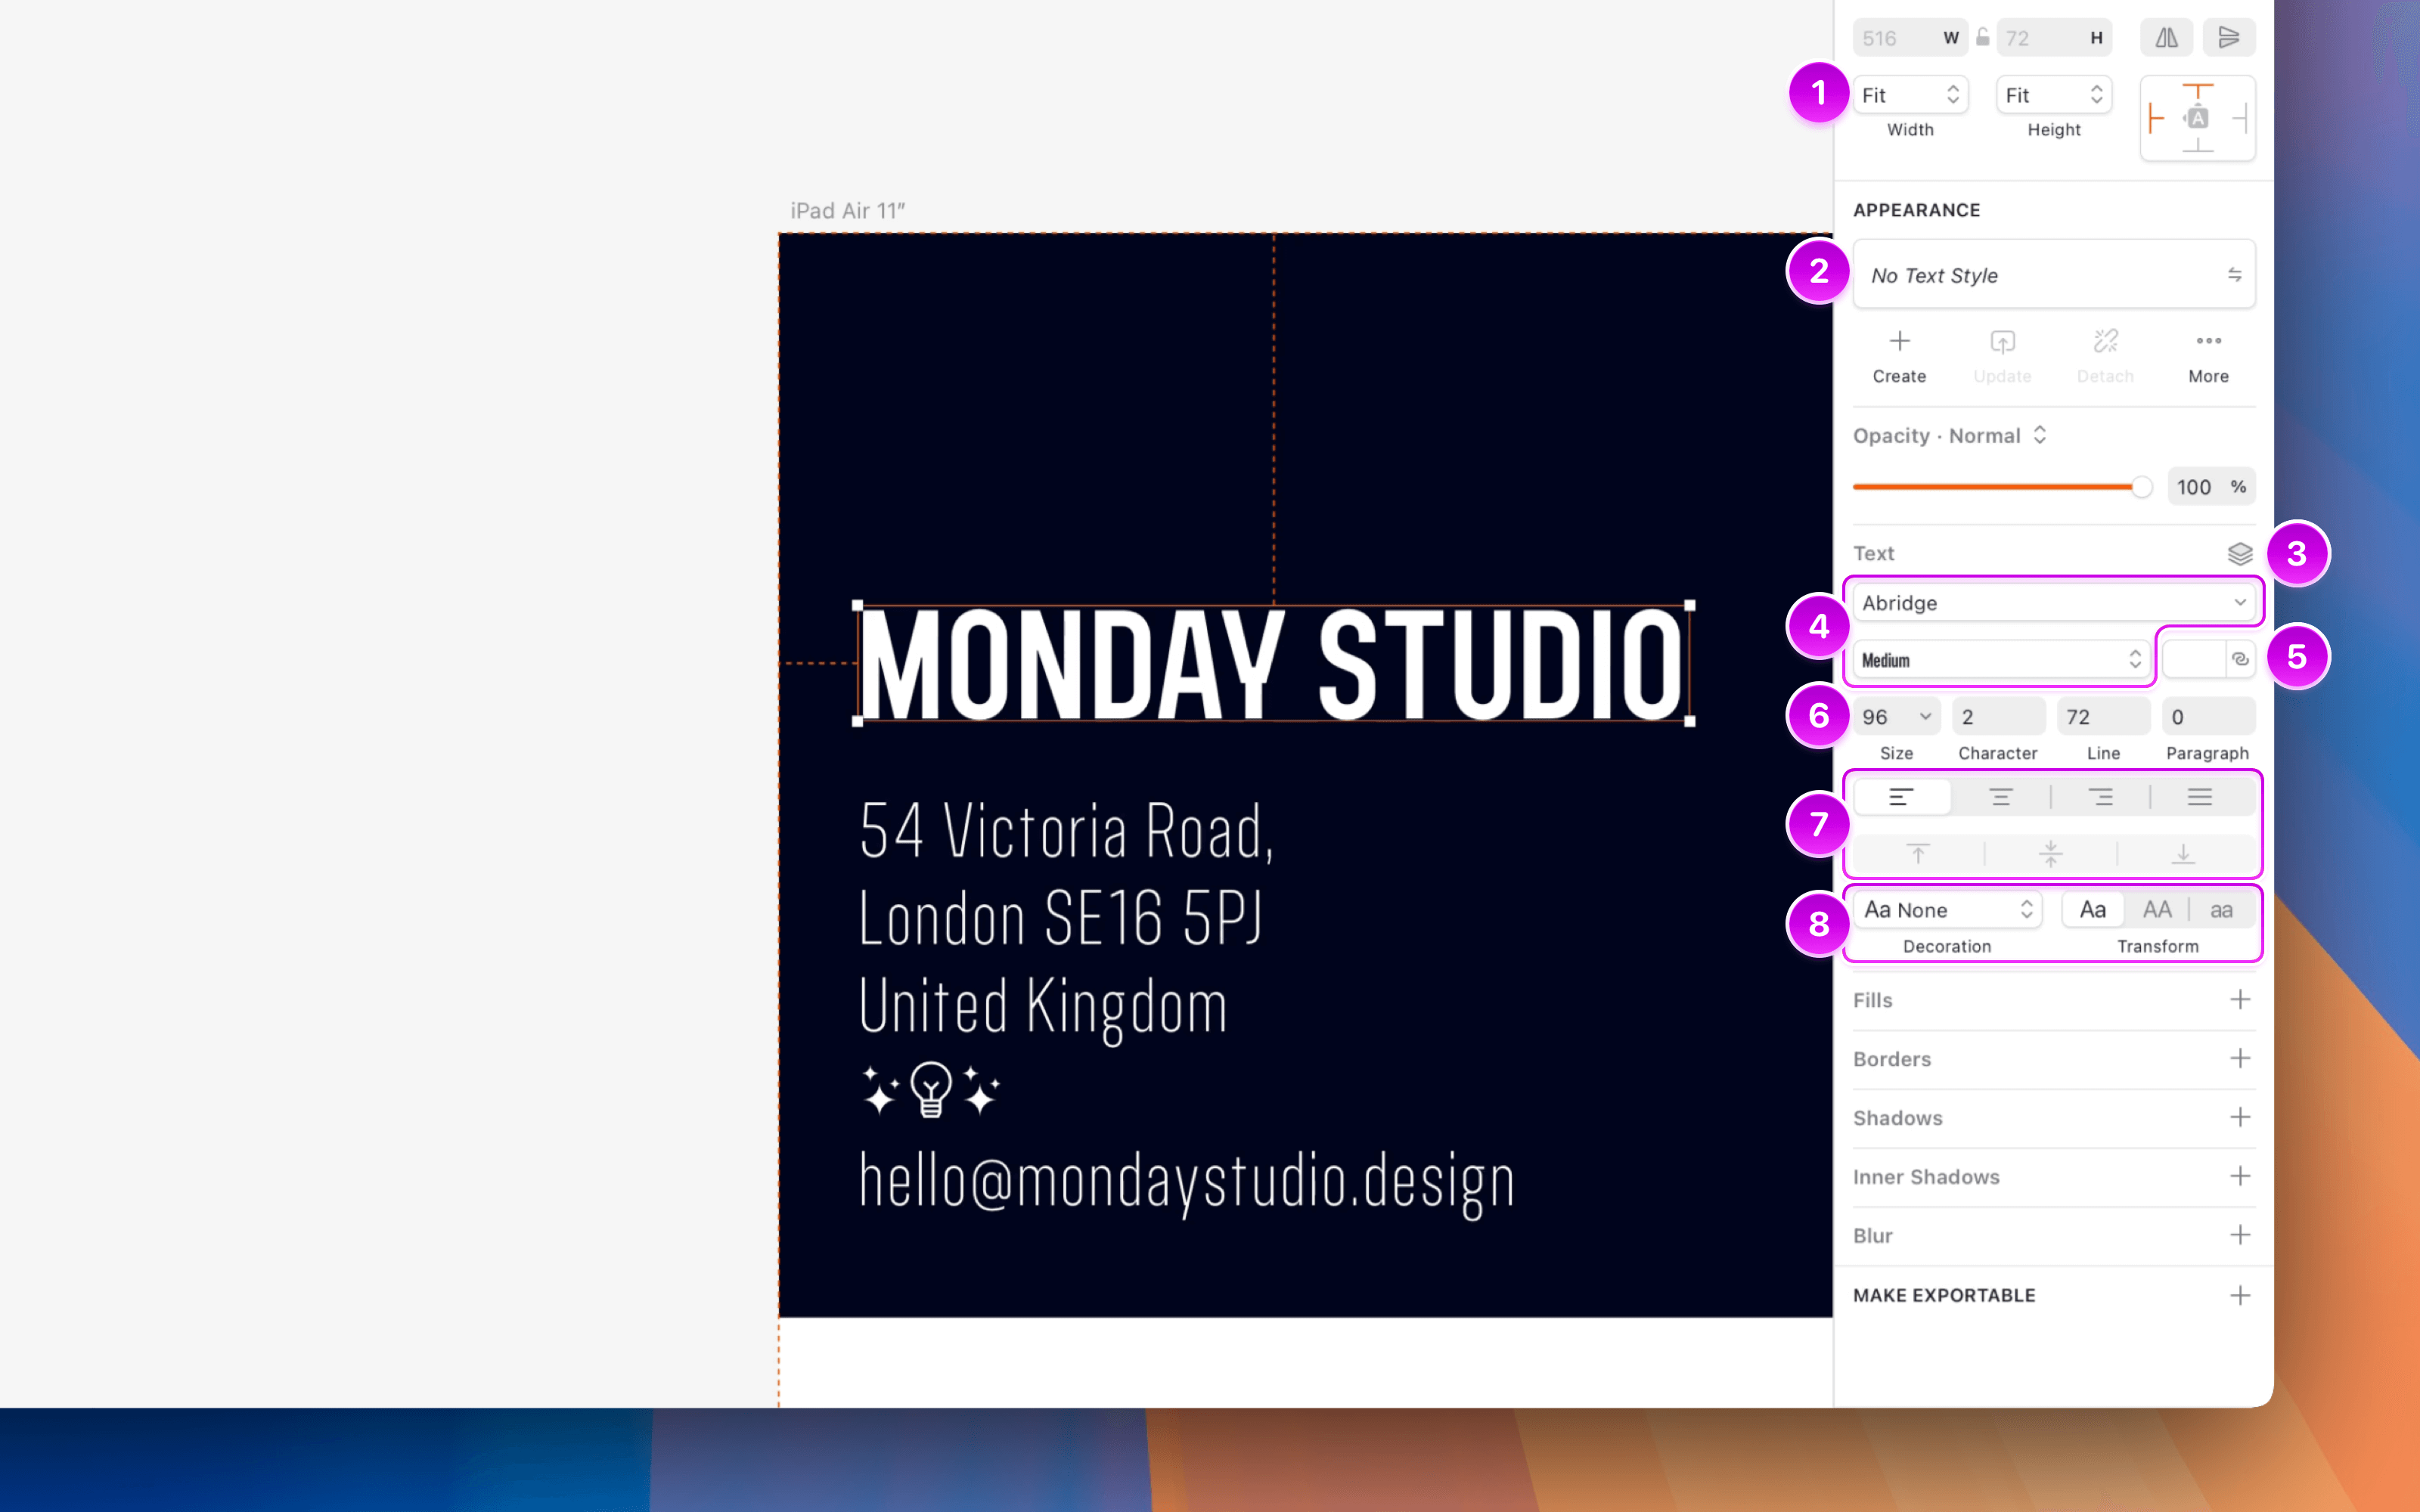
*Text formatting options in the Inspector*
1. Use the Width and Height selectors to control how text layers resize. You can choose from Fit, Fixed, or Relative:
– **Fit** adjusts the layer to match the size of its content.
– **Fixed** keeps the layer at a set size, wrapping the text within it.
– **Relative** resizes the layer based on its parent.
1. Apply [Text Styles](/docs/symbols-and-styles/text-and-layer-styles/text-styles/) using the pop-up menu located below the Appearance section in the Inspector.
1. Use the **Data** button to populate text layers with a [data source](/docs/designing/data/).
1. Use the font family and font weight dropdowns to set your text layer’s typeface and weight. Click the dropdown to open the **Fonts panel**, which has two tabs: **In Use** shows every font used in your current document, and **All Fonts** shows everything available on your system.
1. Click the color well to apply a solid color, or use the icon to apply a Color Variable.
1. Enter values for size, character spacing, line height, and paragraph spacing.
1. Use the alignment controls to adjust horizontal and vertical text alignment.
1. Use the **Decoration** options to underline or strikethrough .
1. Use **Text transform** to set text to uppercase or lowercase . These options are non-destructive, so you can switch formats without losing the original formatting.
**Note:** The Mac app measures all layers (including Text) using the macOS coordinate system’s points — where one point equals one pixel on the Canvas. [Read more about measurements in the Mac app](/support/features/mac-app/points-vs-pixels/).
> **Note:** If the font you’ve selected supports OpenType features you’ll find them at the bottom of the **Text** menu. If the font has variable options, you’ll find these in the Inspector.
### Formatting text using the Text menu
Open the **Text** menu in the Menu Bar to find additional text formatting options, including:
* **Bold**, **Italics** and **Underline**
* **Bigger** or **Smaller** text
* **Transformations**, including uppercase and lowercase
* **Lists**, including unordered and ordered lists
* **Kern**, **Ligature** and **Baseline** options.
### Editing multiple text layers
To edit more than one text layer at the same time, hold ⇧ and select every text layer that you want to edit — either on the Canvas, or from the Layer List. Use the **Text** menu in the Inspector to change the styling of your text.

*How to edit multiple text layers at the same time*
### Customizing lists
To create a list, select a text layer with line items separated by returns, then go to **Text** > **List Type** and choose either **Numbered** or **Bullet**.

*How to create a list*
You can customize your list’s appearance, starting number (for numbered lists), prefixes, suffixes, and bullet or number type by highlighting your list and choosing **Text** > **List Type** > **List Options**.

*How to change a list’s style*
### OpenType features
If you’re using a font that supports OpenType features, select your text and choose **Text** > **OpenType Features** from the Menu Bar, then select and enable the OpenType features you want to use.
### Changing text color
You can apply different colors to different parts of your text using the **Color Picker** in the Inspector’s **Text** panel.
Right-click the color preview to copy its value in different formats, including HEX, RGB, HSL, and SwiftUI.

*You can change text color using the Color Picker in the Inspector*
Alternatively, you can apply a fill from the **Fills** panel in the Inspector — as well as apply different types of [gradients](/docs/symbols-and-styles/styling/gradients/). Keep in mind that fills will override any text color you’ve previously set with the Color Picker.

*Add gradients to text using the Fills option in the Inspector.*
### Adding borders to text
To add borders to text layers, go to the Borders section in the Inspector and click the icon next to a border to explore more options. For more details, see [Border options](/docs/symbols-and-styles/styling/borders/#customizing-borders).
### Adjusting line height
When you create a new text layer, its line height will automatically adjust to match its font size.
If you manually adjust the line height, typeface or font size of a text layer, the text will reposition itself so that the first baseline will always stay in place. Similarly, if you change the typeface or font weight in a paragraph, the line height will stay consistent.
> **Note:** To revert to the text’s default line height, simply delete the custom value in the **Line** field in the Inspector and press ⏎ on your keyboard.

*The text baseline stays consistent, regardless of manual adjustments to line height, typeface or font size*
## Converting text to outlines
Select a text layer and choose **Layer** > **Convert to Outlines** from the Menu Bar. Alternatively, use the Command Bar or press ⌥⌘O. Each character in the text is converted into a vector shape and grouped together.
> **Note:** Converting text to outlines is a destructive process — you won’t be able to edit the text itself again. Also, keep in mind that converting lots of text to outlines can slow down Sketch.

*How to convert text into vector shapes*
If you apply a Boolean operation to a text layer, it will have the same effect as converting it to outlines, except you can still edit the text.

*You can still edit text after applying a Boolean operation to a text layer*